How to Temper Chocolate at Home
- Tempering is controlled crystallization, not careful melting
- What tempering changes
- First decide whether your chocolate needs tempering
- Set up a dry, calm bench
- The home-friendly seeding sequence
- Two legitimate seed methods use different numbers
- How the other tempering methods compare
- Test before you fill a mould
- Keep tempered chocolate workable
- Diagnose the result, then choose the reset
- A one-page bench card
- Sources
Tempering is controlled crystallization, not careful melting
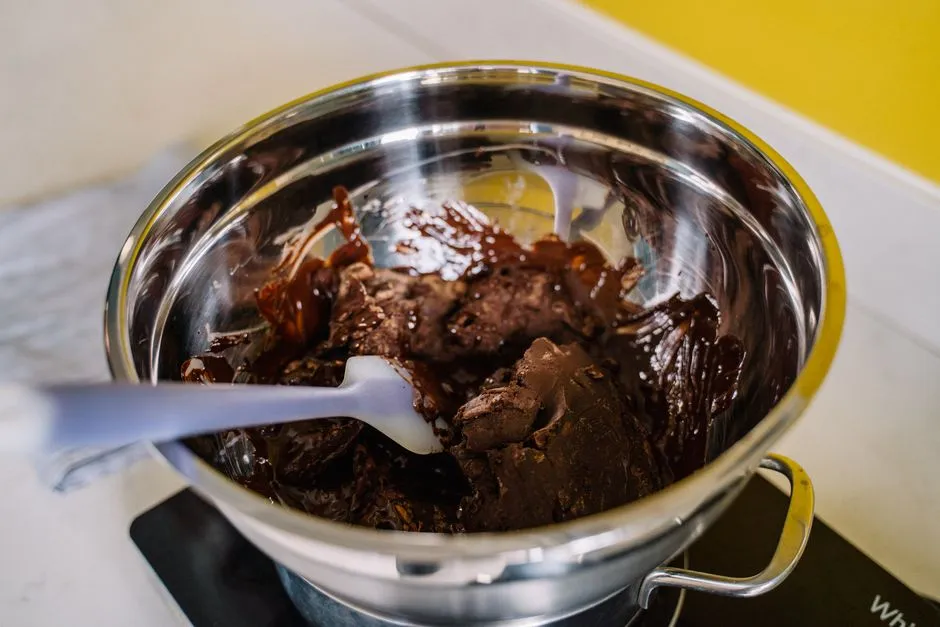
To temper chocolate at home, melt enough cocoa butter crystals to reset the structure, introduce or create stable crystals while cooling and stirring, then bring the chocolate to the working temperature specified for that chocolate. Test a thin sample before dipping or moulding. Seeding - stirring tempered solid chocolate into melted chocolate - is usually the least awkward home method. Use one manufacturer's curve from start to finish; dark, milk, and white chocolate do not share one temperature sequence.
Tempering matters when plain chocolate must set hard and glossy, release from a mould, or form a clean shell. It is usually unnecessary when chocolate is being mixed into cake batter, mousse, brownies, or a ganache where its cocoa butter will not set as an exposed chocolate structure.
What tempering changes
Cocoa butter can crystallize in more than one arrangement, a property called polymorphism. The traditional tempering model aims to establish a useful population of Form V crystals. Those crystals are associated with the gloss, snap, contraction, and melting behavior expected from finished chocolate.
The current science is more nuanced than "Form V equals perfect." A 2025 perspective in Crystal Growth & Design reports that tempered and untempered samples can both contain Form V while differing in snap and structure. Nucleation, crystal distribution, and organization at several scales also matter. For a home cook, the practical lesson is simple: temperature is necessary, but movement, time, chocolate composition, and an actual setting test matter too.
Tempering does not repair scorched chocolate, remove water, or convert compound coating into cocoa-butter chocolate. It organizes the fat already present.
First decide whether your chocolate needs tempering
Read the ingredient list and manufacturer instructions.
- Couverture or real chocolate with cocoa butter: temper it for bars, shells, moulds, dipped pieces, and decorations that must set as chocolate.
- Chocolate used inside a wet recipe: follow the recipe; melting may be enough.
- Compound coating made with another vegetable fat: follow that product's melting directions. A cocoa-butter tempering curve may not apply.
- Already tempered bar, block, pistoles, or callets: it can provide seed only while the solid pieces remain in temper and have been stored well.
Added nuts, crumbs, flavorings, or liquid make the batch harder to diagnose. Learn the method with plain chocolate first.
Set up a dry, calm bench
You need:
- a digital thermometer suitable for the temperatures in the chosen curve;
- a heat-safe bowl;
- a flexible spatula;
- a scale if the method gives a seed percentage;
- finely chopped chocolate or evenly sized drops;
- parchment, a palette knife, or the tip of a clean knife for the temper test;
- the moulds or pieces to be coated, ready before the chocolate reaches working temperature.
The bowl, spatula, thermometer, and chocolate must be dry. Steam and droplets from a bain-marie are enough to create trouble. The guide to why chocolate seizes explains how a small amount of water can make melted chocolate tighten into a grainy mass.
Keep the bowl above, not in, the hot water, and do not let its base touch the water. Remove it before opening a lid or moving a steaming pan. Wipe condensation from the bowl exterior before setting it on the bench. Handle the hot pan and bowl as burn hazards, with stable surfaces and dry heat protection.
Room conditions matter. A very warm room slows setting and makes working temperature harder to hold; a cold bench and cold tools can thicken the chocolate early. Avoid strong sunlight, steam, and a cold draught across the bowl.
The home-friendly seeding sequence
Seeding uses solid, already tempered chocolate to introduce stable cocoa butter crystals into a fully melted portion. The exact fraction and temperature path depend on the chocolate and method, so keep the product curve beside the bowl.
- Reserve the stated seed. Keep it solid, dry, finely chopped, and at the temperature required by the method.
- Melt the working portion. Stir gently and measure the chocolate itself, not the air above it or the hot bowl wall.
- Leave the heat. Dry the outside of the bowl if it came from a bain-marie.
- Add seed as directed. Stir steadily so crystals are distributed through the mass.
- Follow that method's cooling path. Some seed methods cool directly to working temperature. Others cool to a lower crystallization point and then combine with reserved warm chocolate or rewarm slightly.
- Remove any stubborn solid pieces when the method says to stop seeding. Do not raise the entire batch above its final working limit merely to dissolve one piece.
- Test a sample. Start the project only after the thin sample sets as expected.
- Hold the working range. Stir periodically, measure in more than one place, and warm gently only within the chosen curve.
The movement is part of the work. Stirring evens out temperature and distributes crystals. Avoid whipping air into chocolate intended for thin shells or glossy moulded surfaces.
Two legitimate seed methods use different numbers
This is where home instructions often become a collage. Do not combine these examples.
Callebaut's Callets method
Callebaut's official method states that when its melted chocolate is around 40 degrees C, a rule of thumb is to add 5% Callets at 15-20 degrees C. Its tutorial then gives working targets of about 31 degrees C for dark chocolate and about 29 degrees C for milk and white chocolate, with continued stirring. If the seed melts too quickly, the tutorial treats the chocolate as still too hot and calls for more Callets.
For a 1,000 g batch, 5% is 50 g because 1,000 x 0.05 = 50. That arithmetic applies to this stated method, not automatically to another brand's seed ratio.
Valrhona's three-temperature method
Valrhona publishes a different sequence. Its chart gives:
| Chocolate | Melt | Cool/crystallize | Work |
|---|---|---|---|
| Dark | 50-55 degrees C | 28-29 degrees C | 31-32 degrees C |
| Milk | 45-50 degrees C | 27-28 degrees C | 29-30 degrees C |
| White or Dulcey | 45-50 degrees C | 26-27 degrees C | 28-29 degrees C |
For seeding, Valrhona directs the cook to melt three-quarters of the chocolate to the first temperature, remove one-third of that melted portion to another bowl, add the remaining solid quarter to the main bowl and stir to the second temperature, then add back enough reserved warm chocolate to reach the third temperature.
Both are published seed methods. They differ in starting material, proportions, and thermal path. Choose the instructions for the chocolate in front of you. A generic temperature chart is an orientation tool, not permission to override a bag's crystallization curve.
How the other tempering methods compare
| Method | Best fit | What makes it work | Main drawback |
|---|---|---|---|
| Seeding | Small to medium home batches | Tempered solid chocolate supplies crystal nuclei | Requires suitable seed and careful temperature control |
| Microwave/direct | Small batches that start in good temper | Chocolate is warmed gradually without destroying all useful crystals | Easy to create hot spots or overshoot if instructions are vague |
| Tabling | Larger batches and experienced hands | Melted chocolate is moved across a cool stone surface, then recombined | More tools, mess, and exposed surface; bench temperature matters |
| Tempering machine | Frequent or larger batches | Controlled heat and agitation maintain a repeatable process | Cost, space, minimum batch size, and cleaning |
| Pre-crystallized cocoa butter | Product-specific workflows | A measured crystal source is added at its stated temperature | Requires following that product's exact dose and method |
Callebaut describes seeding as suitable for small to medium quantities, microwave tempering as useful for small amounts, and tabling as a classic method. Valrhona calls tabling less suitable for some kitchens because it normally needs a marble surface.
Method names do not guarantee identical procedures. "Microwave tempering" can mean preserving some original crystals by controlled partial melting, while another microwave recipe may fully melt and then seed. Follow the complete instructions, not the label alone.
Test before you fill a mould
Dip a clean palette knife or knife tip into the chocolate, or spread a thin smear on parchment. Leave it undisturbed in the same room where the batch will be used.
Callebaut's under-crystallization guide uses five minutes as its palette-knife check: if the chocolate has not hardened, the batch lacks the required amount of cocoa butter crystals under that test. Use that as a manufacturer-specific checkpoint, not a universal stopwatch. Room temperature, layer thickness, chocolate type, and surface temperature affect setting.
A useful test sample should begin setting evenly rather than remaining wet, tacky, or streaked. Once fully set, it should be firm for its type and show an even surface. Dark chocolate generally gives a clearer snap than milk or white, so do not judge all three by the same sound.
Test during a long working session as well as at the start. The bowl can drift warmer and lose useful crystals, or become over-crystallized and thick as the work continues.
Keep tempered chocolate workable
Measure frequently and stir gently. Warm only a small amount at a time, using the chosen product's working range as the ceiling. Callebaut's general guide explicitly says not to let the chocolate rise above the final temperature on its curve.
If the chocolate becomes thicker while staying near working temperature, it may be accumulating too many crystals. Gentle warming within the working range can reduce the crystal population. If it is thin, slow to set, or the sample stays tacky, it may be under-crystallized; Callebaut's guidance adds more tempered seed and stirs it in.
Do not solve every texture problem with heat. Chocolate can be naturally less fluid because of its formulation. Adding unmeasured cocoa butter, oil, or water changes the product and can change the finished shell. Use chocolate whose stated fluidity suits the project.
Diagnose the result, then choose the reset
| Symptom | Likely process issue | Next move |
|---|---|---|
| Test stays wet or soft | Too few useful crystals, warm room, or thin hot batch | Check temperature and room; add seed only according to the method and retest |
| Chocolate becomes very thick | Too many crystals or mass cooled too far | Warm gently within the permitted working range and retest |
| Finished surface is dull or streaked | Temper drift, uneven mixing, poor setting conditions, or contaminated mould | Remelt clean chocolate and run a complete curve; clean and dry moulds |
| Moulded piece will not release | Poor temper, insufficient setting, or mould problem | Do not force it; reassess temper and mould condition |
| Chocolate turns grainy suddenly | Moisture may have caused seizing | Stop treating it as a temper problem; follow the seizing guide |
| Temper test passes, later work fails | Batch drifted during use | Recheck temperature and make another sample before continuing |
Poorly tempered plain chocolate can usually be melted and tempered again if it has not been scorched, contaminated with water, or mixed with ingredients that make the original curve inappropriate. Scrape it from clean parchment or moulds, keep crumbs and fillings out, and begin the full method again.
Streaks that appear after storage can also be bloom rather than an immediate temper failure. The guide to storing chocolate to help prevent bloom covers temperature swings, humidity, wrapping, and condensation.
A one-page bench card
Before starting, write these fields from the manufacturer's guidance:
| Field | Your batch |
|---|---|
| Chocolate and lot | |
| Batch mass | |
| Method | |
| Seed mass or fraction | |
| Melt temperature | |
| Cooling/crystallization temperature | |
| Working range | |
| Room temperature | |
| Test started | |
| Test result |
That small record turns the next batch into a comparison. "It worked last time" becomes "this dark couverture used this curve, this seed amount, and this room condition." Chocolate is much easier to troubleshoot when its temperatures are written down before the bowl begins making decisions for you.